Introduction
The easiest way to plan a clean gallery wall is to lay everything out first and mark positions once—not measure every frame individually.
Most people overcomplicate this. They grab a tape measure, start calculating distances, and end up with uneven spacing anyway.
There’s a simpler way that actually works.
Start on the Floor, Not the Wall
Before you touch the wall, place all your frames on the floor.
This gives you a clear view of:
- spacing
- proportions
- overall balance
Move things around until it looks right. Don’t rush this part—it saves time later.
Pick One Anchor Piece
Every gallery wall needs a starting point.
Choose one frame as your anchor:
- usually the largest piece
- or the one at eye level
Once that’s set, everything else builds around it.
Keep Spacing Consistent (Don’t Guess)
Spacing is where most gallery walls fail.
A simple rule that works:
- 2–3 inches between frames
- keep it consistent across the entire layout
If spacing changes randomly, the wall looks messy—even if each frame is straight.
Don’t Measure Every Frame
This is where people waste the most time.
Instead of measuring:
- each frame
- each gap
- each position
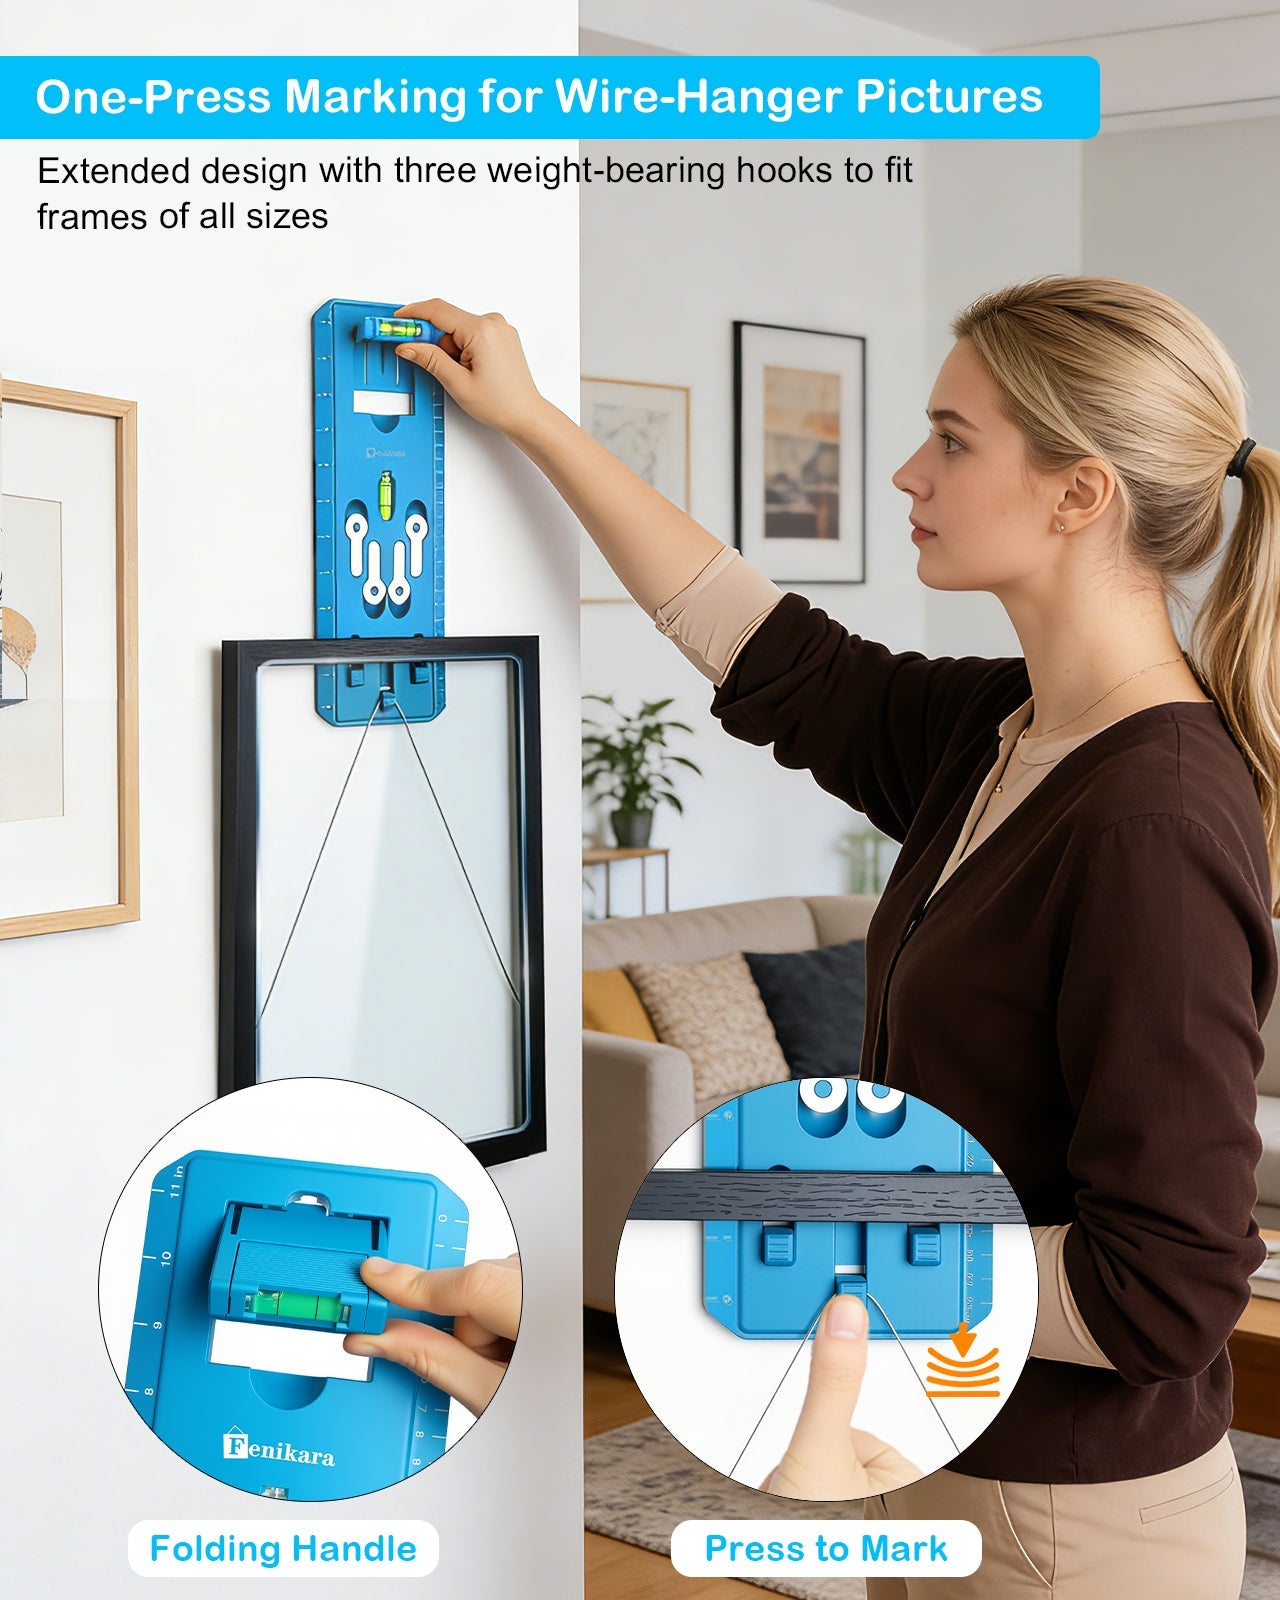
Focus on transferring the actual hanging points directly to the wall.
That’s what keeps alignment clean without overthinking it.
Mark Everything Before Installing Anything
Do not install one frame at a time.
Mark all positions first.
Why this matters:
- you can adjust layout before committing
- spacing stays consistent
- no extra holes
Once everything is marked, then install.
The Cleanest Way to Keep Everything Aligned
When you're dealing with multiple frames, small errors stack up fast.
That’s why people end up with:
- slightly uneven rows
- frames that drift off line
- inconsistent spacing
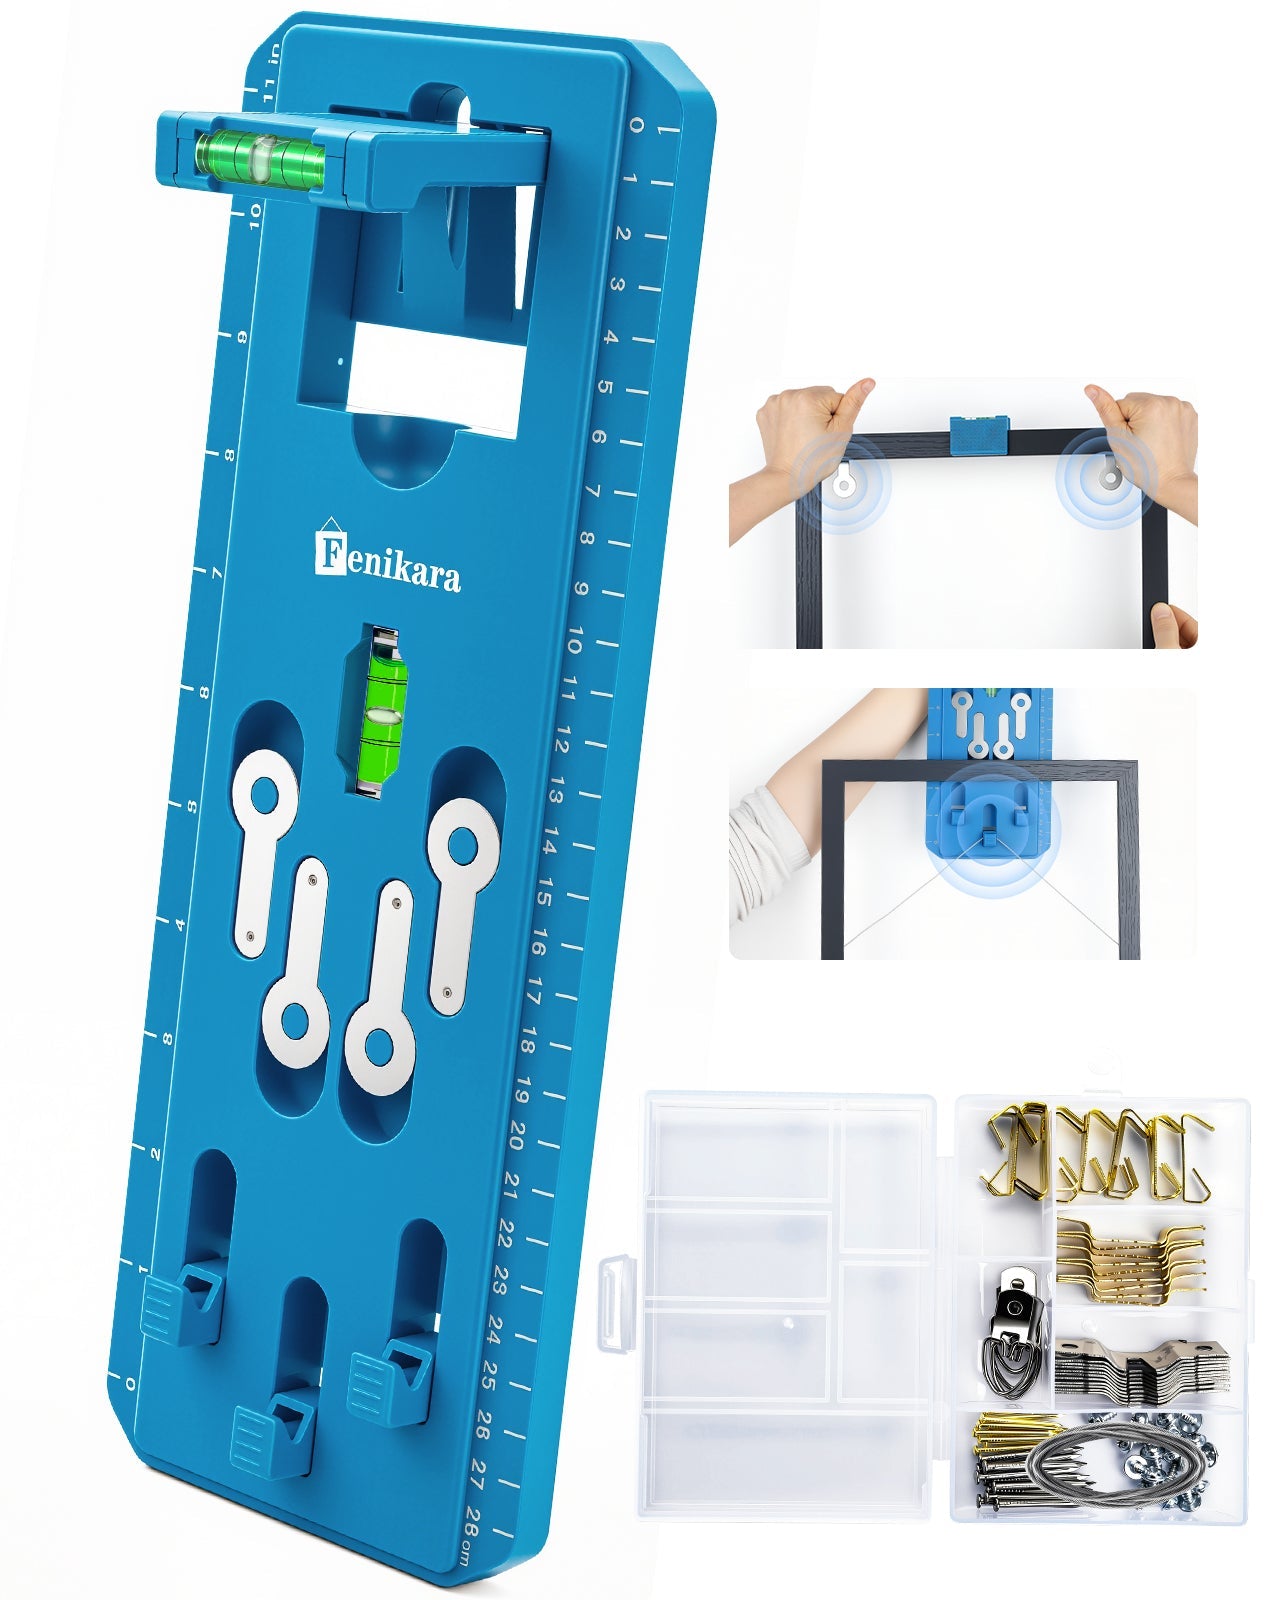
Using a positioning-based picture hanging kit helps because it keeps every mark consistent without recalculating distances each time.
Layout Styles That Actually Work
If you’re not sure how to arrange your wall decor, start with one of these:
Grid layout
- clean and symmetrical
- best for same-size frames
Centered layout
- one main piece in the middle
- smaller frames around it
Organic layout
- mixed sizes
- more casual look
- still needs consistent spacing
Linear layout
- frames in a straight line
- works well above furniture
Common Mistakes to Avoid
- Starting on the wall instead of planning first
- Changing spacing between frames
- Measuring everything manually
- Hanging one frame at a time
- Not stepping back to check the overall layout
Most of these lead to rework.
Practical Tips That Make It Easier
- Take a photo of your floor layout before hanging
- Use that photo as your reference
- Work from the center outward
- Step back often to check alignment
- Don’t rush the marking stage
FAQ
What is the easiest way to plan a gallery wall?
Lay everything out on the floor first, then transfer positions to the wall.
Do all frames need to be the same size?
No. Mixed sizes work well as long as spacing stays consistent.
How far apart should frames be?
2–3 inches is the most commonly used spacing.
Should I measure each frame placement?
No. Mark the actual hanging points instead of measuring everything.
What’s the biggest mistake in gallery wall setups?
Inconsistent spacing and adjusting after installation.
Final Thoughts
A good gallery wall isn’t about perfect measurements—it’s about consistent spacing and accurate placement.
Plan first, mark once, and install after everything is aligned.
That’s what keeps the wall clean and balanced.