Introduction
The easiest way to hang wall art straight is to mark the exact hanging point before you drill or nail—anything else leads to crooked frames and extra holes.
Most people don’t mess up because they lack tools. They mess up because they measure, adjust, and redo the same step multiple times.
Here’s a simpler, cleaner way to do it right the first time.
Step-by-Step: How to Hang Wall Art Correctly
Step 1: Decide the exact position on the wall
Pick the height first. For most wall decor, the center of the frame should sit around 57–60 inches from the floor (eye level standard in the U.S.).
If you’re building a gallery wall, map out the layout before touching the wall.
Step 2: Mark the hanging point (this is where most people go wrong)
Do not guess. Do not eyeball.
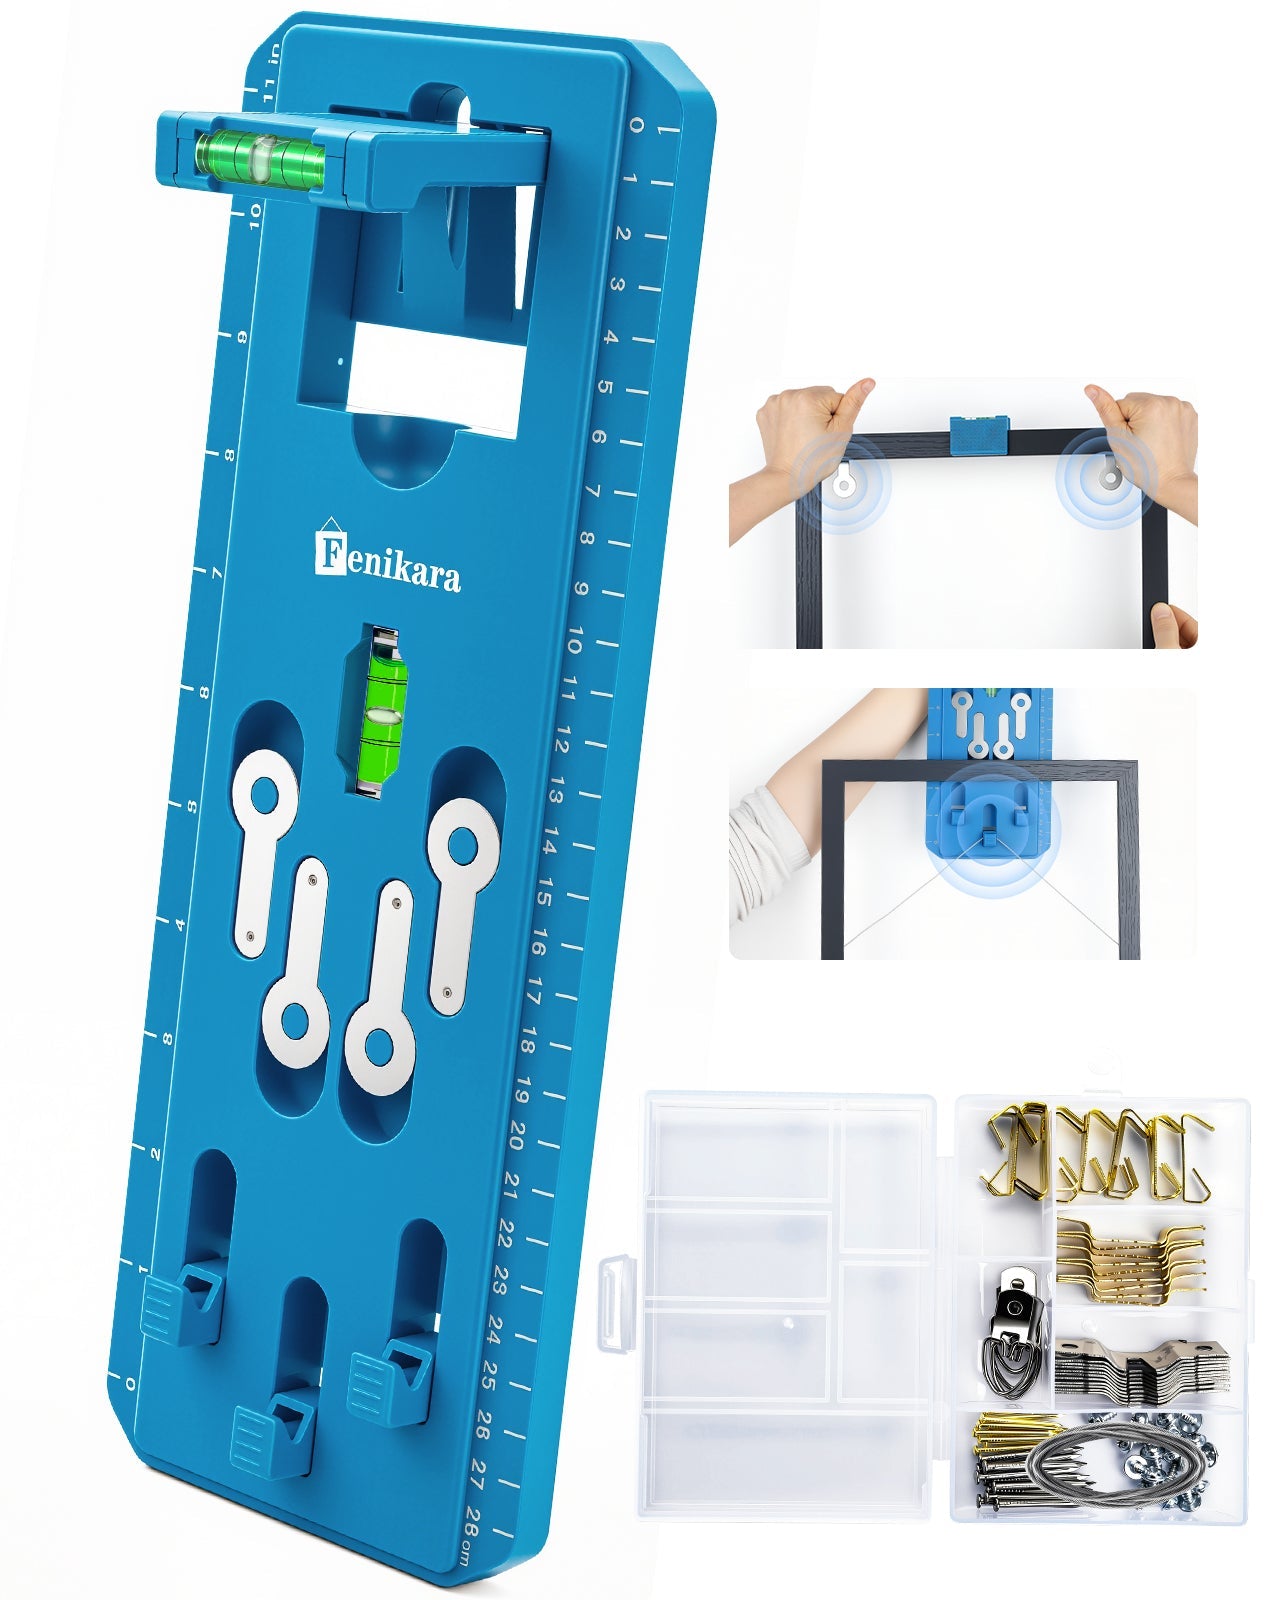
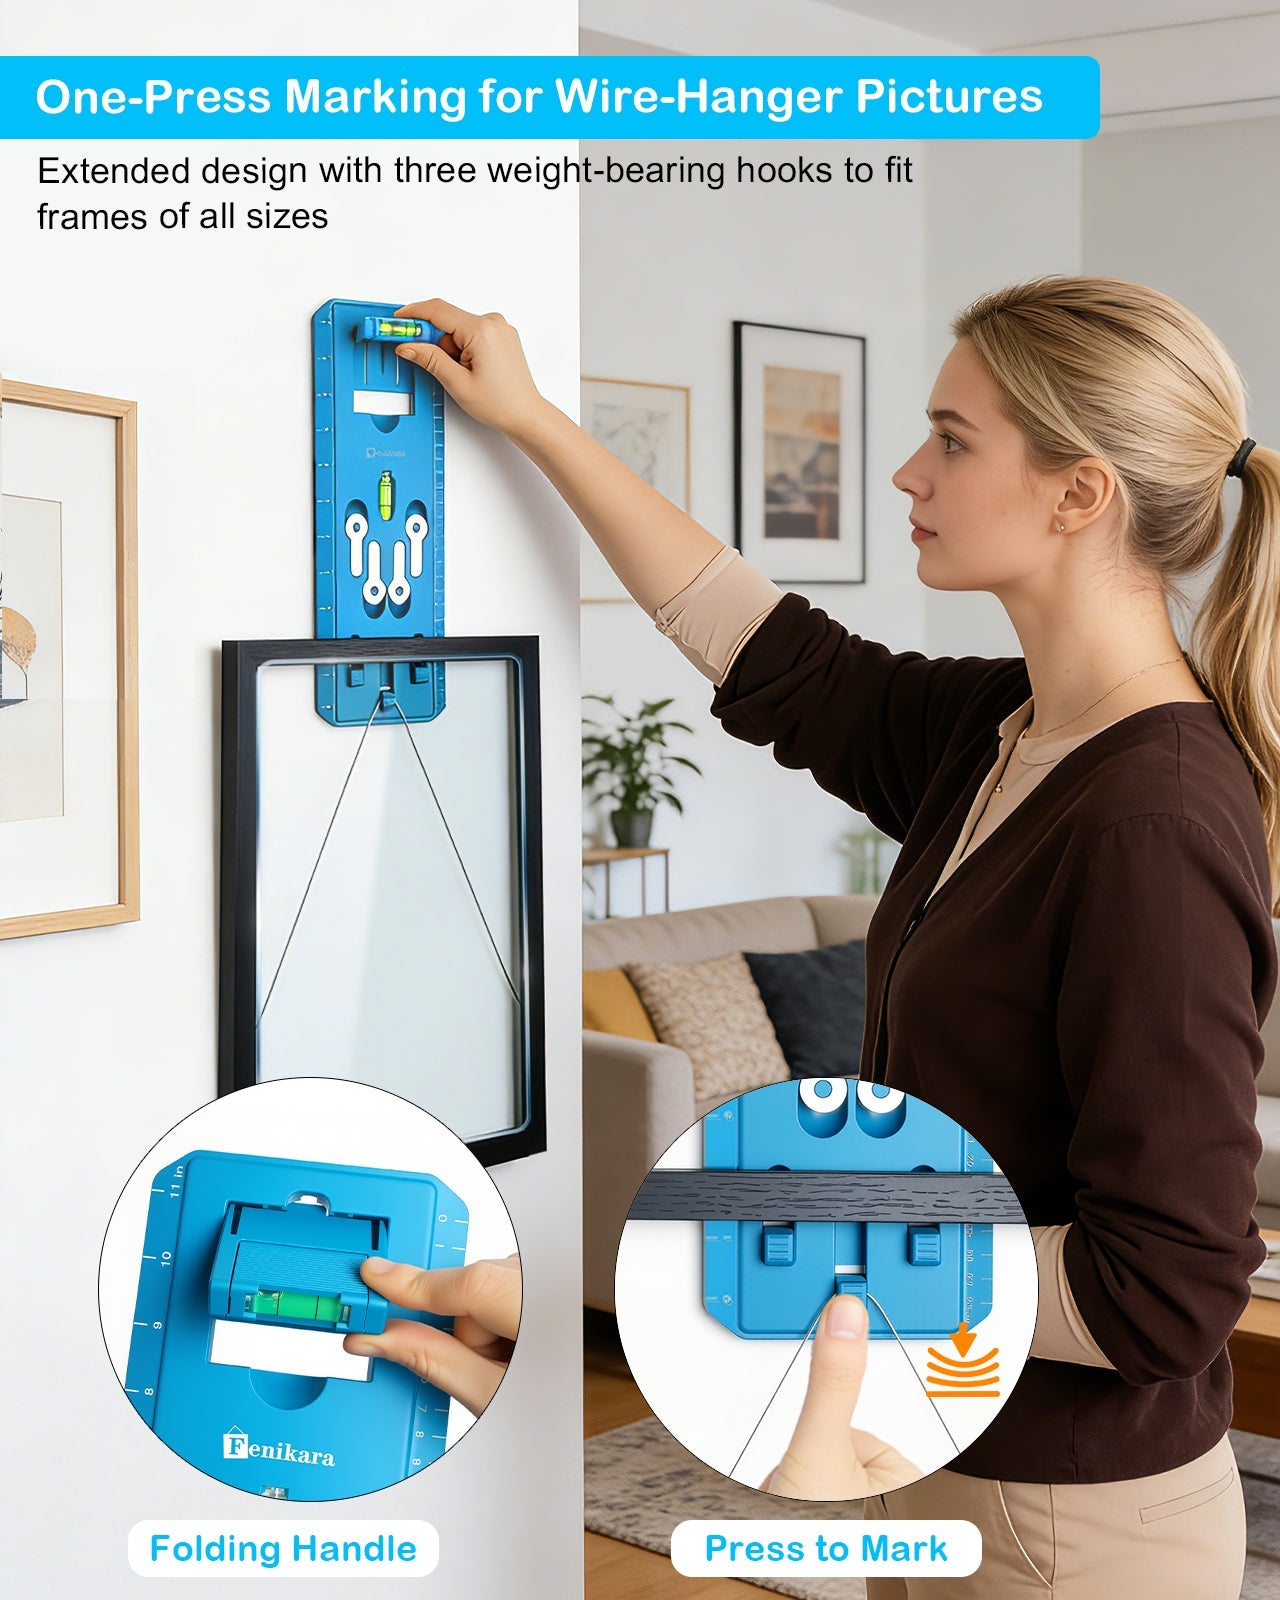
Instead, transfer the hanging point from the back of the frame directly onto the wall.
If you skip this step or do it manually with a tape measure, you’ll likely redo it.
Step 3: Install the hook or nail
Once the mark is correct:
- Use the appropriate hook or nail
- Make sure it matches the frame weight
- Keep the angle slightly upward for better support
This step should only happen once—if your marking is correct.
Step 4: Hang and check alignment
Place the frame and check:
- Is it level?
- Is spacing consistent (if multiple frames)?
If everything was marked correctly, you shouldn’t need adjustments.
The Fastest Way to Avoid Crooked Frames
Most alignment problems come from one habit: measuring everything manually.
That usually leads to:
- uneven spacing
- slight tilts
- multiple holes
Using a positioning-based picture hanging kit removes that issue because it lets you mark exactly where the hook should go without calculations.
That’s the main difference between a clean wall and a messy one.
When to Use Command Strips vs Hooks
Be direct about this:
- Use command strips picture hanging for:
- lightweight frames
- temporary setups
- Use hooks or nails (with a picture hanging kit) for:
- heavy frames
- gallery walls
- long-term wall decor
Trying to use strips for everything is one of the most common mistakes.
Common Problems (and Why They Happen)
Frame keeps tilting
→ Hook placement is slightly off
Multiple holes in the wall
→ Re-measuring and adjusting
Uneven spacing between frames
→ Measuring each frame separately
Frame falls off
→ Wrong mounting method for the weight
All of these trace back to one issue: inaccurate marking.
Pro Tips That Actually Make a Difference
- Always mark first, then install
- Don’t rely on visual alignment
- Use one reference point for multiple frames
- Keep spacing consistent (2–3 inches between frames works well)
- If you’re hanging more than one piece, plan the layout on the floor first
FAQ
What is the easiest way to hang wall art straight?
Mark the exact hanging point first, then install the hook. This removes guesswork.
Why do my frames always end up crooked?
Because the hanging point is slightly off. Even a small error becomes visible once the frame is up.
Do I need a level every time?
Not always. If your marking is accurate, alignment is usually correct without constant adjustments.
Are picture hanging kits better than measuring manually?
Yes. They reduce steps and improve accuracy, especially for multiple frames.
What’s the biggest mistake beginners make?
Trying to measure everything instead of marking the actual hanging point directly.
Final Thoughts
If you want straight, evenly spaced wall art, stop measuring everything manually and focus on accurate marking instead.
That single change is what separates a clean setup from a frustrating one.